|
|
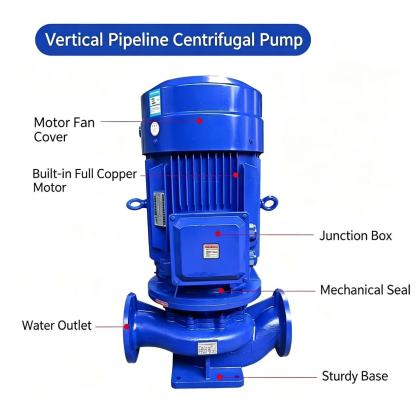
ISG Vertical Pipeline Centrifugal Pump priming operation guidanceProper priming is one of the most critical pre-operation procedures for ISG vertical pipeline centrifugal pumps, as these units do not carry inherent self-priming capability and cannot build sufficient internal pressure to draw fluid from the suction line if the pump chamber remains filled with air. Many field operators overlook subtle details during priming, leading to persistent air entrapment, unstable flow, unexpected seal wear, and extended commissioning delays that could have been easily avoided. A well-executed priming process follows a step-by-step sequence tailored to the specific installation layout, suction lift conditions, and system piping configuration of each site. Pre-Priming System Condition CheckBefore introducing any fluid into the pump casing, confirm that all valves on the suction side are fully opened, while the discharge gate valve remains in a closed or nearly closed position to prevent fluid from escaping immediately after filling. Inspect all drain points, vent taps, and flange connections along the suction line to make sure no unintended openings will allow air to re-enter the system once priming is complete. If the installation includes an inline strainer on the suction side, verify that the strainer housing is securely fastened and its drain plug is tightened, so no air pockets can form inside the filter chamber to disrupt the priming process. For systems with a positive suction head where the fluid level sits above the pump centerline, double check that the isolation valve on the suction tank or reservoir is fully open, allowing unobstructed fluid flow toward the pump inlet. This pre-check step eliminates common hidden issues that often cause repeated priming failures even after repeated attempts to fill the pump casing.
Fluid Introduction and Air Evacuation ProcessBegin the priming operation by slowly opening the priming port or dedicated fill connection on the upper section of the pump casing, allowing process fluid to flow steadily into the pump chamber and connected suction piping. As fluid fills the internal volume, trapped air will naturally rise to the highest points of the flow path, so keep the pump casing vent plug slightly open to release displaced air continuously without letting new air get drawn back into the system. Do not rush this filling process, as pouring fluid in too quickly can create swirling turbulence that traps small air bubbles inside the impeller and volute, making them nearly impossible to remove completely later. Continue adding fluid until a clear, steady stream of liquid flows out from the open vent port with no visible air bubbles mixed in, indicating that the pump chamber and suction line are fully saturated. Once this condition is reached, tighten the vent plug and priming port cap securely, making sure there are no loose threads or damaged sealing surfaces that could create air leakage paths during subsequent operation. Post-Priming Validation and Startup ReadinessAfter the priming ports are all sealed, leave the pump undisturbed for 3 to 5 minutes and observe the fluid level through any available sight glass or pressure gauge on the suction side. A stable, unchanged fluid level or consistent static suction pressure reading confirms that no significant air leakage exists on the suction side, and the primed condition will remain intact when the pump is started. Manually rotate the pump shaft through two to three full revolutions slowly, to check for any trapped air pockets that may still be lodged near the impeller vanes, and confirm that no unexpected resistance or scraping sound appears during the movement. If the pressure reading on the suction gauge drops noticeably during this waiting period, it indicates that air is still being drawn into the system through a loose connection or leaking seal, and you must locate and resolve the leak before attempting to prime the pump again. Only when all these validation checks are completed successfully can the pump be considered properly primed and ready for safe startup under normal operating conditions. |