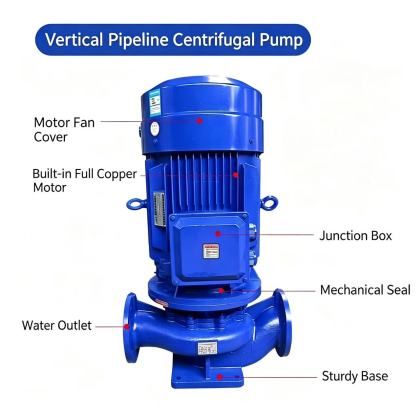
Effective bearing inspection is one of the most reliable ways to prevent unexpected vertical pipeline centrifugal pump failures and extend the unit’s overall operating life. When performed systematically on site, these checks can reveal early signs of wear, misalignment, or lubrication degradation long before they develop into serious damage. Every inspection step relies on practical field measurement and visual assessment, making it accessible for maintenance teams working on routine or planned shutdown tasks.
In-service running condition monitoring
Start the inspection while the pump is still operating under normal load, to capture real performance data that cannot be obtained after shutdown. Use a contact thermometer to measure the outer surface temperature of the bearing housing at multiple points, and confirm readings stay within the stable operating range without sudden spikes or uneven hot spots. Listen closely to the noise emitted from the bearing area using a stethoscope or a solid metal rod placed against the housing, to identify any irregular grinding, rumbling, or high-pitched squealing that deviates from the smooth, consistent sound of healthy bearings. Measure both radial and axial vibration levels at the bearing housing, and record the values for comparison against previous baseline readings; a steady upward trend in vibration over weeks or months usually indicates developing wear inside the bearing assembly. These running condition checks provide the first layer of early warning without requiring any disassembly.
Dismounted bearing surface and dimensional assessment
Once the pump is isolated, drained, and fully disassembled, remove the bearing from the shaft carefully using proper pulling tools to avoid striking or prying on the rolling elements or raceways. Wipe every part of the bearing completely clean with lint-free cloth and appropriate cleaning fluid, then perform a full visual check across all surfaces. Look for visible signs of pitting, spalling, discoloration, micro-cracks, or indentation marks on the inner race, outer race, rolling elements, and cage structure, as these are clear indicators of fatigue damage or overload history. Use a micrometer to measure the shaft journal diameter and check for any reduction in size from wear, then verify the internal clearance of the bearing against the original design tolerance. Excessive clearance beyond the allowed range means the bearing can no longer maintain stable rotor positioning and should not be returned to service. This detailed dismounted assessment eliminates the risk of reusing a compromised bearing that could fail shortly after reassembly.
Lubrication and mounting interface verification
Inspect the residual lubricant taken from the bearing housing for signs of contamination, such as metal particles, water intrusion, or dark discoloration that signals thermal degradation. Both over-greasing and under-greasing can cause abnormal operating temperatures, so confirm the lubricant fill quantity matches the recommended level rather than being packed to full capacity. Check the bearing housing bore, shaft shoulder, and locking fastener surfaces for wear marks, fretting corrosion, or burrs that could prevent the new or reused bearing from seating squarely during installation. Verify that all mounting bolts on the bearing housing are tightened to the correct torque value, with no looseness that could create relative movement between the bearing and its supporting structure. This final verification step ensures that even a perfectly good bearing will not suffer premature failure due to poor mounting condition or incorrect lubrication practice.


